Pistachio Macarons with Chocolate Ganache

macaroons

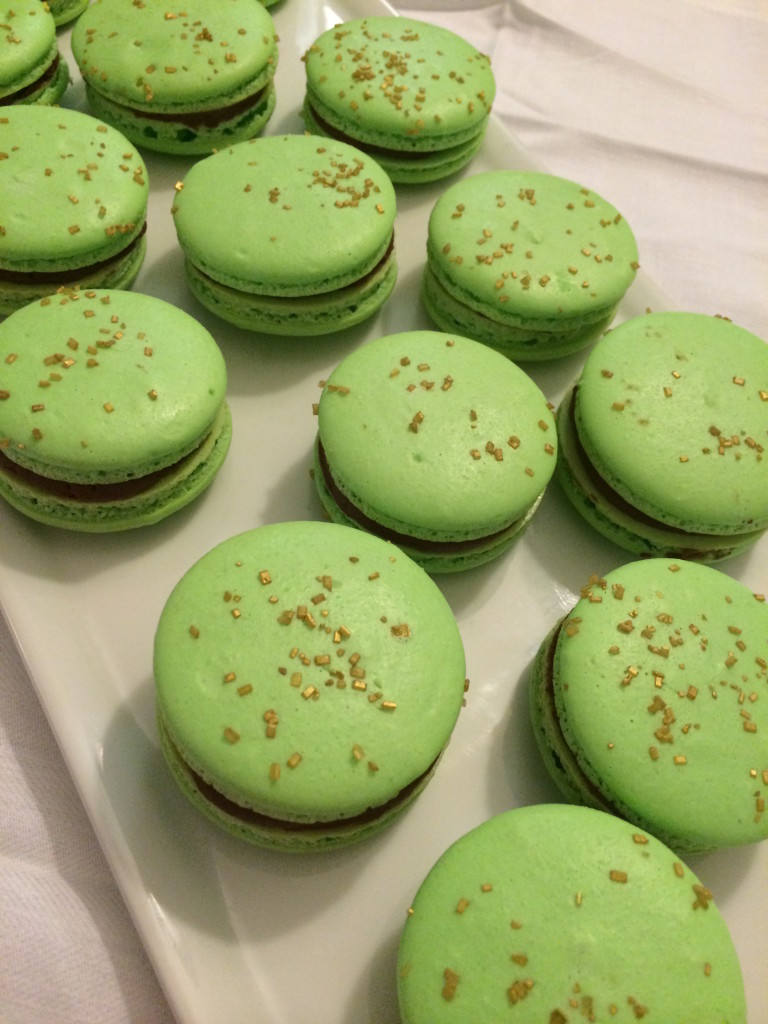
Treat yourselves to these pistachio macarons to add some sweetness to your St-Patrick festivities. Pairing the taste of chocolate and pistachio is always a great combination. Serves 12 or more. 

macaroons

The ingredients below are for one batch of macarons (either round or heart-shaped). For the second batch, repeat ingredients and follow same directions.

Ingredients: (for the macaron shells)

–  2 cups of confectioners sugar

–  1 cup ground almond meal

–  1 cup of roasted unsalted shelled pistachios

–  4 large egg whites, room temperature

–  ¼ cup granulated sugar

–  Green natural food coloring

–  Gold edible sprinkles

–  Silicone macaron baking mat or double parchment paper

– 16 inch pastry bag

– One number 12 decorating tip

Directions:

1.  Preheat oven to 300 degrees.

2.  In a food processor, blend the pistachios until obtaining fine ground texture.

3.  Sift the almond meal, confectioners sugar and ground pistachios into a mixing bowl or blend in a food processor until finely ground. Set aside.

4. Beat the egg whites in a mixmaster with a whisk attachment on medium speed until the mixture is foamy and soft peaks.

5.  Gradually add the granulated sugar to the egg whites and mix on high until the egg mixture is glossy and stiff peaks.

6.  Add the food colors and whisk on low to combine well.

7.  Gently fold the egg white mixture in batches into the almond meal/pistachio mixture, taking the egg mixture from the middle and up while rotating the mixing bowl. Continue until all of the batter has been folded into the almond meal/pistachio mixture and is thoroughly combined to obtain a lava-like consistency (about 30-40 folds), but not too runny or overmixed.

8.  Place silicone mat or parchment paper onto a baking tray.

9.  Cut tip of pastry bag, place number 12 decorating tip into the end of the bag and twist the end.

10. Place pastry bag, tip side down, into a tall cup to fill it easily.

11.  Fill pastry bag with macaron mixture.

12.  Twist top of pastry bag to close.

13. Pipe 1 and 1/2 inch circles onto silicone mat or parchment paper until all mixture is used.

14.  Decorate macarons with gold sprinkles and or your choice of topping (optional).

15. Tap baking tray 5 times on kitchen counter and fist punch gently the bottom of the baking tray to release the air bubbles from the macarons.

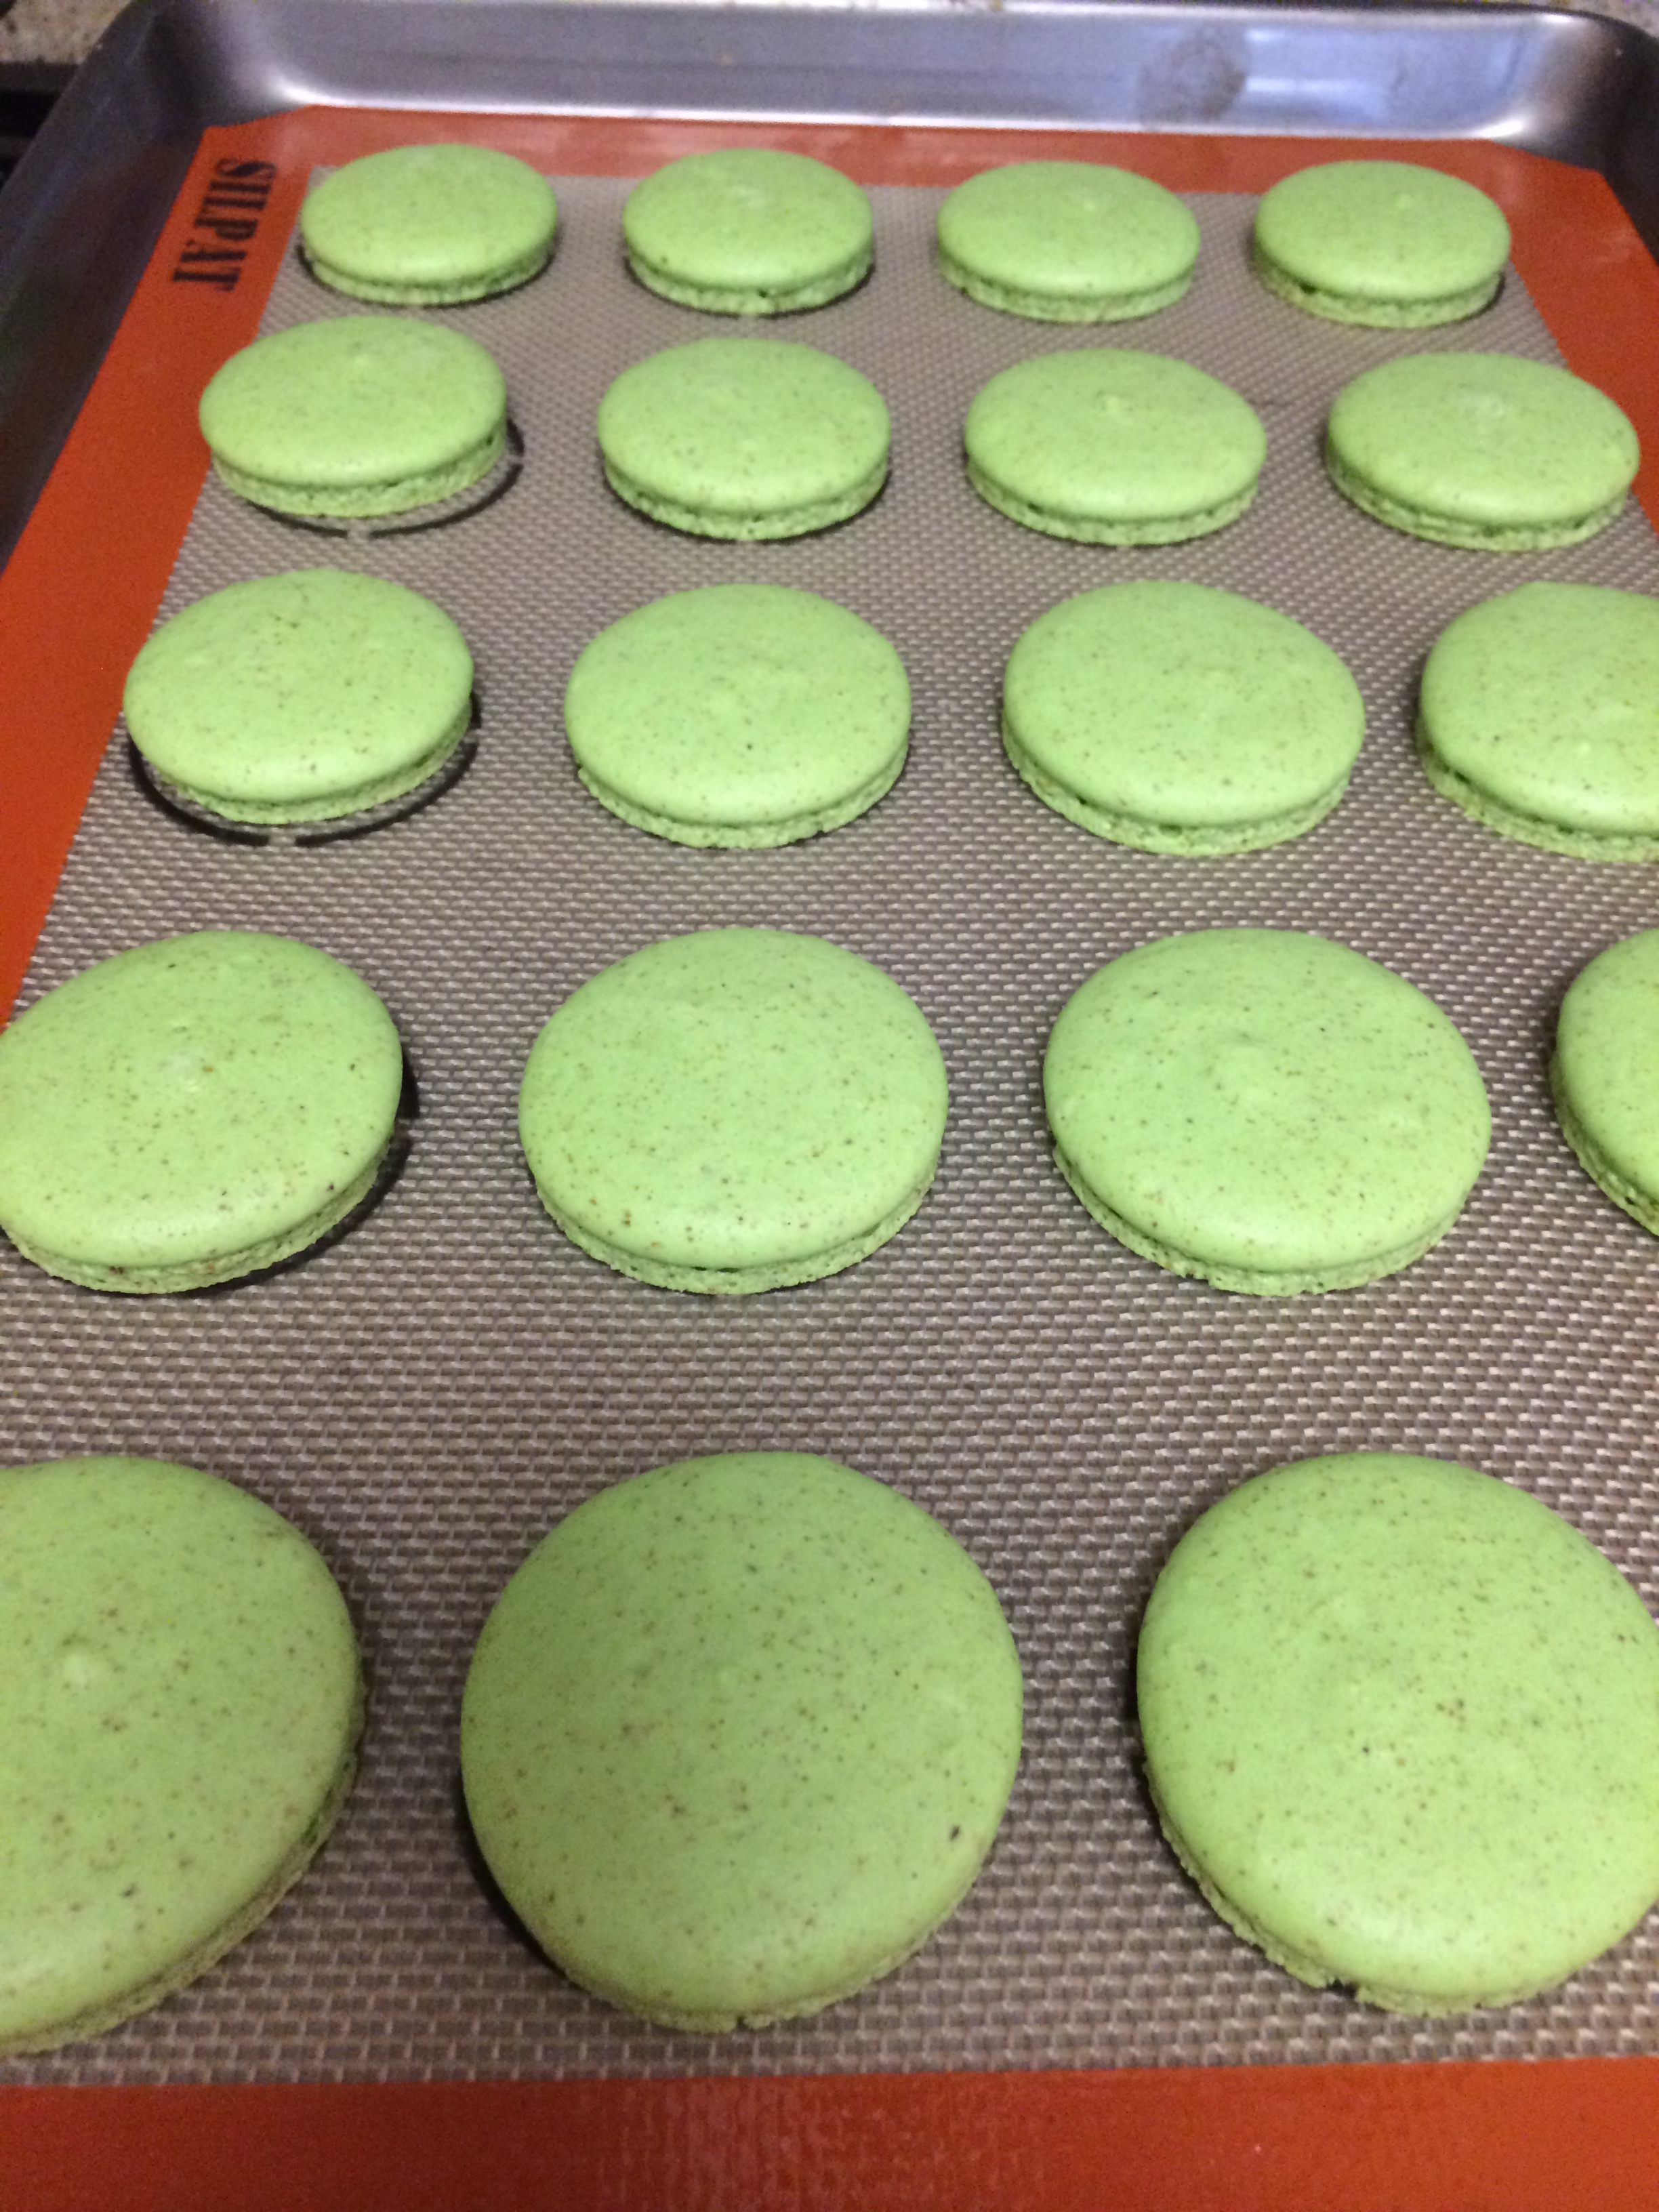
16. Let macarons stand for 20 minutes until the top of the shells are dry.

17.  Place macarons on middle rack of the oven and bake for 20 minutes.

18.  Remove from oven and let stand for one hour.

macaroons before


Ingredients for Ganache:

– 6oz or 3/4 cup bittersweet chocolate or any chocolate of your choice

– 3/4 cup heavy whipping cream

– 2 teaspoon unsalted butter

– 1 teaspoon of Grand Marnier or any liquor of you choice

– 16oz piping bag

– Pipe tip #2a

Directions:

1. Place chopped chocolate in a mixing bowl.

2. In a saucepan combine butter and cream over medium heat and remove before reaching boiling point.

3. Immediately pour cream mixture on the chocolate and let sit for a couple of minutes until chocolate melts.

4. With a whisk, mix the ganache well and add liquor while mixing.

5. Let the ganache cool down for 30 minutes.

6. Place in refrigerator and chill for 1hour.

7. Put together the piping bag with pipe tip #2 and fill with ganache.

8. Pipe ganache onto one half of the macaron shells and place a second on top to close.

9.  Remove macarons from tray and place on decorative plate.


The Petite Gourmande

© 2018 by Ruth Barnes, all rights reserved

facebooktwittergoogle_pluspinterestlinkedinmailfacebooktwittergoogle_pluspinterestlinkedinmailby feather

Mint Tea

mint tea

Morocco’s traditional drink, mint tea, is served in restaurants and homes throughout the country. It is drunk after meals, with dessert, and throughout the day. It is ceremoniously poured from a height into small tea glasses and served with fresh mint leaves. When I was young, my father would often cut the mint directly from out garden, and I grow it in my home today.


mint tea


Serves 4 to 6


Ingredients:

4 1/2 cups boiling water plus extra to clean the teapot

1 small bunch of spearmint leaves

2 1/2 teaspoons Chinese gunpowder green tea

4 tablespoons sugar


Directions:

1.Bring water to a boil in a kettle or medium saucepan.

2. Rinse the mint leaves and pat dry with paper towels or a clean dish towel.

3. Clean the teapot with a small amount of boiling water and then discard the water. Add the tea and a little more boiling water, and swirl the water.

4. Add the  mint leaves, sugar, and the 4 1/2 cups of boiling water to the teapot, stir, cover, and let stand for four minutes.

5. Pour the tea into glasses and serve with a dessert.

Happy Cooking!

The Petite Gourmande

© 2018 by Ruth Barnes, all rights reserved


facebooktwittergoogle_pluspinterestlinkedinmailfacebooktwittergoogle_pluspinterestlinkedinmailby feather

Valentine Macarons

macarons 2

Valentine Macarons


Love is in the air, and these beautiful French delights, both heart-shaped and round, will make anyone feel like they are in Paris. They are both elegant and delicious, and can be made with different colors and fillers. Serves 15 or more


macarons 1The ingredients below are for one batch of macarons (either round or heart-shaped). For the second batch, repeat ingredients and follow same directions.


Ingredients: (for the macaron shells)

2 cups of confectioners sugar

1 cup ground almond meal

3 egg whites, room temperature

¼ cup granulated sugar

3-4 drops rose water

pink and red gel food coloring

gold edible sprinkles

miniature heart toppings

silicone macaron baking mat or double parchment paper

silicone heart-shaped baking mat

16 inch pastry bag

one number 12 decorating tip

Directions

1.  Preheat oven to 300 degrees.

2.  Sift the almond meal and confectioners sugar into a mixing bowl or blend in a food processor until finely ground. Set aside.

3. Beat the egg whites in a mixmaster with a whisk attachment on medium speed until the mixture is foamy and soft peaks.

4.  Gradually add the granulated sugar to the egg whites and mix on high until the egg mixture is glossy and stiff peaks.

5.  Add the food colors and rose water and whisk on low to combine well.

6.  Gently fold the egg white mixture in batches into the almond meal mixture, taking the egg mixture from the middle and up while rotating the mixing bowl. Continue until all of the batter has been folded into the almond meal mixture and is thoroughly combined (about 30-40 folds), but not too runny or overmixed.

7.  Place silicone mat or parchment paper onto a baking tray.

8.  Cut tip of pastry bag, place number 12 decorating tip into the end of the bag and twist the end.

9.  Place pastry bag, tip side down, into a tall cup to fill it easily.

10.  Fill pastry bag with macaron mixture.

11.  Twist top of pastry bag to close.

12. Pipe 1 and 1/2 inch circles onto silicone mat or parchment paper until all mixture is used.

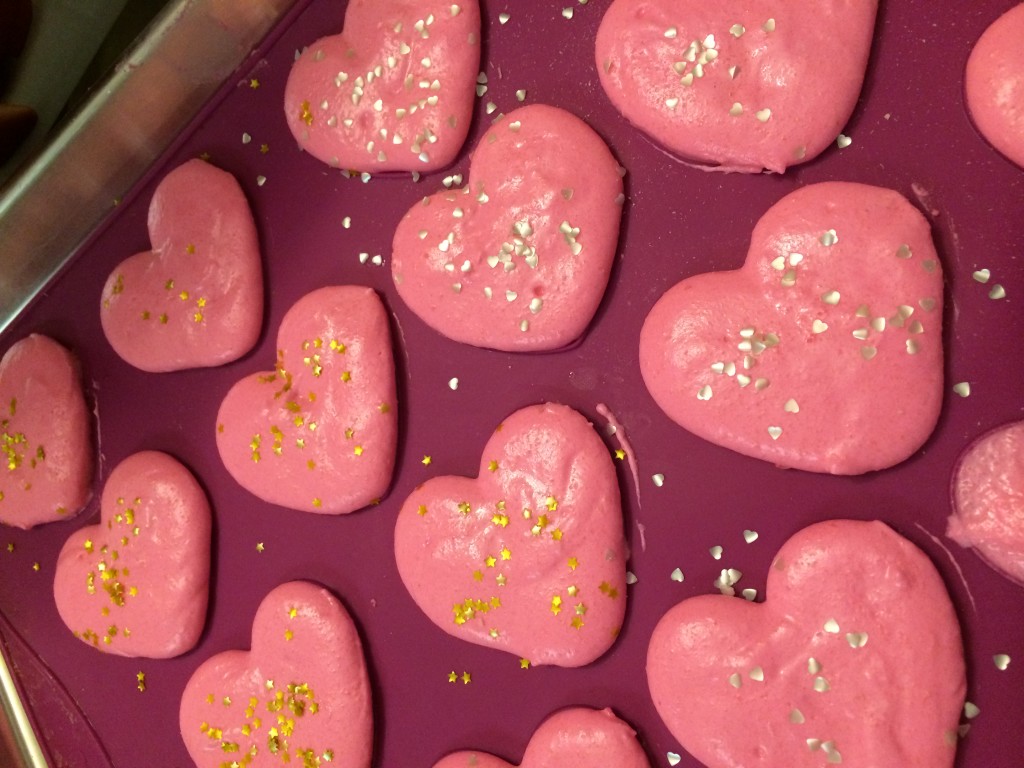
13.  If making heart-shaped macarons, pipe mixture onto heart-shaped figures on mat.

14.  Decorate macarons with sprinkles and mini hearts (or your choice of topping)

hearts

15. Tap baking tray 5 times on kitchen counter and fist punch gently the bottom of the baking tray to release the air bubbles from the macarons.

16. Let maracons stand for 20 minutes until the top of the shells are dry.

17.  Place macarons on middle rack of the oven and bake for 15 minutes.

18.  Remove from oven and let stand for one hour.

19.  For the filling, mix 2 cups of unsalted butter and 1 cup of confectioners sugar in a food processor with ¼ teaspoon of rose water and 4 drops of pink gel food coloring. Beat until soft and place into a pastry bag.

20.  Pipe onto half of the maracon shells and place a second shell on top.

21.  Remove macarons from tray and place on decorative plate.


macarons 2


HAPPY VALENTINES DAY!

The Petite Gourmande

© 2018 by Ruth Barnes, all rights reserved
facebooktwittergoogle_pluspinterestlinkedinmailfacebooktwittergoogle_pluspinterestlinkedinmailby feather

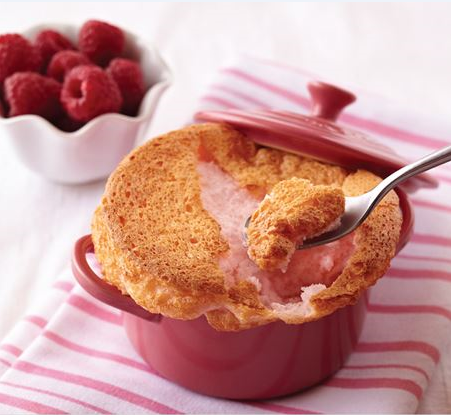
A Valentine’s Day Raspberry Souffle

Raspberry Souffle Image

A Valentine’s Day Raspberry Souffle


Valentine’s Day is an extra special day to honor the people that we love. I think it’s important to honor them everyday and to tell them that you love them, but this is the perfect occasion to do something extra special. I love baking fun desserts on Valentine’s Day and surrounding myself with flowers. I owned two flower shops many years ago, and I still love flowers. I believe that no gesture (or bouquet of flowers) is too big or too small because it’s truly the thought that counts.

This recipe is a favorite of mine because I love raspberries, rosewater, and the color pink! This recipe is designed for cocottes or ramekins for individual servings. You can decorate it with raspberries, or anything else you like.

Raspberry Souffle Image


Read post

facebooktwittergoogle_pluspinterestlinkedinmailfacebooktwittergoogle_pluspinterestlinkedinmailby feather

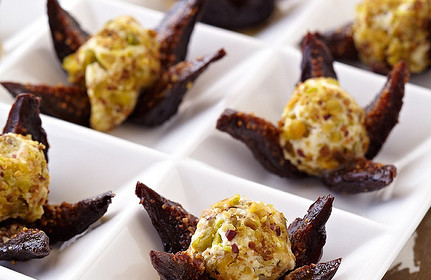
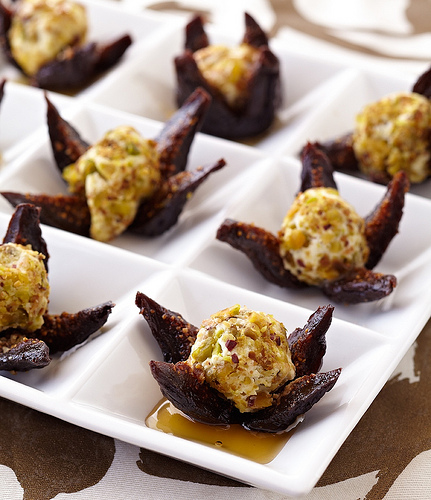
Stuffed Figs with Goat Cheese and Honey

figs

In my back yard when I was a young child we had fig trees and one of the trees hung over the barn roof. When I came from school my friend and I would climb up the tree on to the roof and pick the figs. I used to bring as many as I could carry for my Mom because she loved to make jam, put them in salads, stuffed them, and baked with them.


Stuffed Figs with Goat Cheese, Pistachios, and Honey

figs


Serves 4 to 6

Ingredients:

12 black mission figs

½ cup chopped pistachios (optional: walnuts or hazelnuts)

¼ cup honey

1 large baking dish

8 oz. goat cheese


Directions:

Preheat oven to 350 degrees

1. Chop the pistachios finely

2. Mix pistachios with cheese

3. Rinse the figs and gently dry them

4. Quarter them, leave the base whole

5. Mix goat cheese and pistachios in a bowl

6. Make 1 inch balls of mixture (goat cheese and pistachios)

7. Stuff the figs with the mixture

8. Place them on a baking dish

9. Drizzle honey on them

10. Bake for 10 to 15 minutes

11. Serve warm or cold

Happy cooking!
The Petite Gourmande
© 2018 by Ruth Barnes, all rights reserved


facebooktwittergoogle_pluspinterestlinkedinmailfacebooktwittergoogle_pluspinterestlinkedinmailby feather

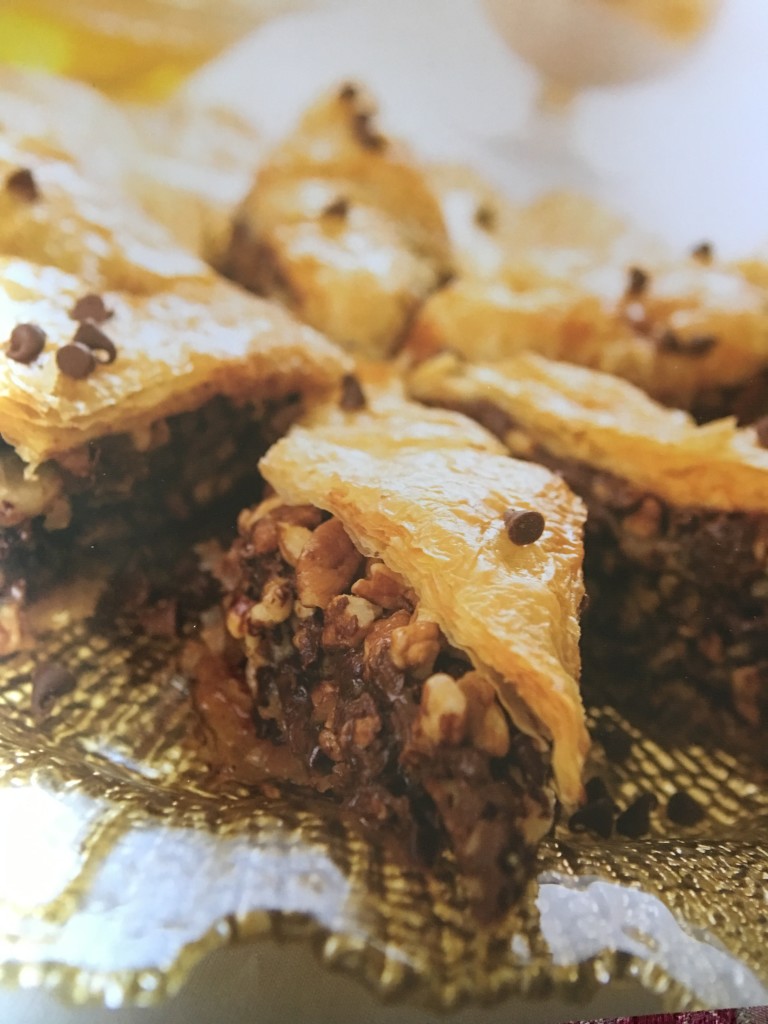
Chocolate Baklava

CHOCOLATE BAKLAVA

This is my own take on the classic Moroccan baklava. It’s a rich and decadent dessert with hazelnut, chocolate, orange blossom and honey. Perfect for entertaining. Serves 24


Ingredients:

– 24 sheets phyllo dough, thawed if previously frozen

– 1 pound unsalted butter

– 1/2 cup unsalted, roasted hazelnuts, chopped finely for the garnish

The filling:

– 1 pound unsalted, roasted hazelnuts

– 2 tablespoons orange blossom water or rose water

– 2/3 cup sugar

– 1 pound semisweet mini chocolate chips

The syrup:

– 3/4 cup water

– 1 cup sugar

– Juice of 1/2 lemon

– 1 cup honey

– 3 tablespoons orange blossom water


Directions:

1. Preheat the oven to 325 degrees.

2. Prepare the filling: combine the hazelnuts, orange blossom water, and sugar in a food processor and chop coarsely. Add in the chocolate and mix.

3. to clarify the butter, melt the butter in a small saucepan over low heat until it begins to boil. Skim the foam from the top and discard. Remove the saucepan from the heat.

4. Unwrap the phyllo dough and place in on a flat surface. While you are working with a phyllo sheet, keep the rest of the block covered with plastic wrap and a kitchen towel to prevent it from drying out.

5. Using a pastry brush, coat a medium baking dish with a small amount of melted butter.

6. Lay one sheet of the phyllo in the dish and brush it with butter. Cover with a second sheet and brush it with butter. repeat until you have a layer of 6 sheets. Spread a third of the nut mixture over the phyllo layer.

7. Repeat step 6 twice more and top with a final layer of phyllo.

8. Make 3 cuts across the dough, approximately 3 1/2 inches apart across the length, and 2 cuts that are 3 1/4 inches across the width. Cut diagonally across each square, making 24 individual pieces (or cut diagonally across the length and width to make diamond shapes).

9. Pour the remaining butter all over the pastry and bake for 1 hour at 325 degrees.

10. While the baklava is baking, prepare the syrup: combine the water, sugar, and lemon juice in a small saucepan. Bring to a boil, lower the heat, and simmer, stirring occasionally, for about 5 minutes or until the sugar is completely dissolved. Remove for the heat and stir in the honey and orange blossom water. Refrigerate until the baklava is ready.

11. When the baklava has finished baking, remove it from the oven and pour the cold syrup all over. Sprinkle pinches of hazelnuts on top of each piece.

12. Let it cool before serving.


Happy Cooking!

The Petite Gourmande

© 2018 by Ruth Barnes, all rights reserved

facebooktwittergoogle_pluspinterestlinkedinmailfacebooktwittergoogle_pluspinterestlinkedinmailby feather

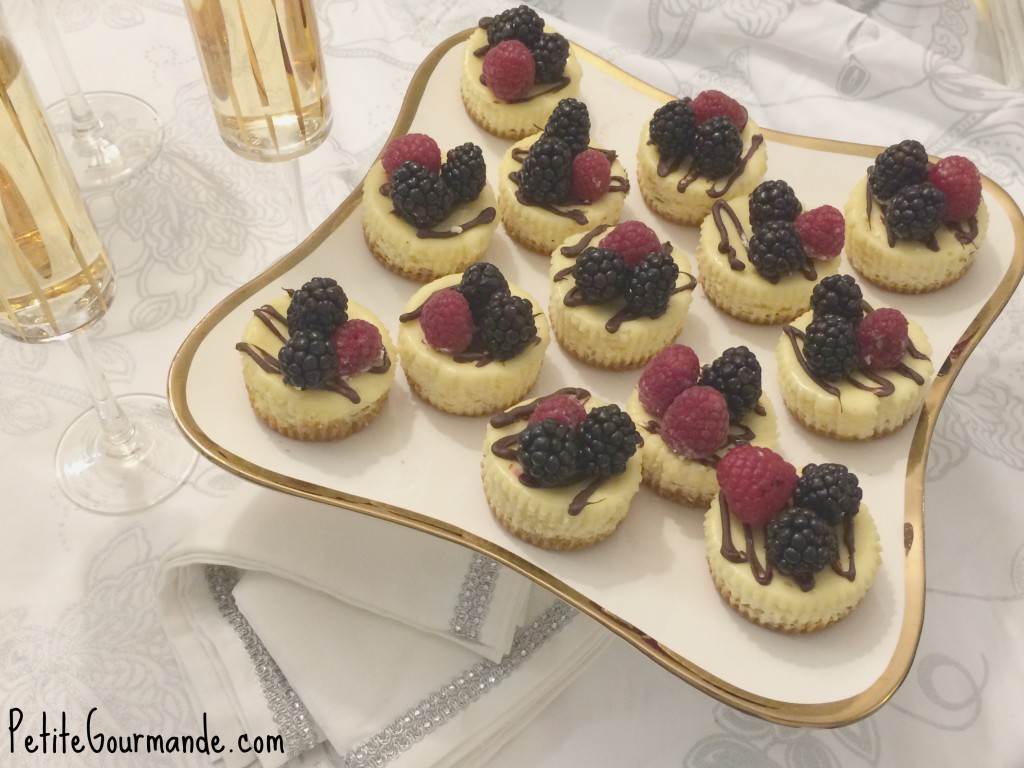
Baby Cheesecakes

Baby Cheesecakes from The Petite Gourmande

These wonderful baby cheesecakes are great for entertaining or a little individual treat for yourself with a cup of coffee. I use at least two different types of berries. Perfect for New Year’s Eve (they go great with a glass of bubbly!) or any special celebration, your guests will be delighted by the decadent individual portions on a fancy platter and will probably go back for seconds. Double the recipe if you want leftovers. :) Makes approximately 16 pieces


Baby Cheesecakes from The Petite Gourmande


Ingredients:

For the crust

1½ cups graham cracker crumbs

2 sp granulated sugar

3 TB unsalted butter, melted

For the filling and topping

3 8-oz packages cream cheese, softened

2 tsp vanilla extract

2 tsp lemon zest

3 eggs

1 cup granulated sugar

1 TB flour

½ pint each blackberries and raspberries or blueberries for the topping

1 small bag semi-sweet chocolate pieces (for decorative topping)


Directions:

1. Preheat oven to 325 degrees. Line 12-cup muffin tin with cupcake liners.

2. In a medium mixing bowl combine graham cracker crumbs, sugar, and melted butter and mix well.

3. Place one heaping teaspoon of the graham cracker crumb mixture into each cup and flatten to bottom. Set aside.

4. In a standing mixer or using electric beaters, beat the cream cheese on medium low until soft and smooth. Reduce speed to low and add the sugar. Add eggs one at a time, then add vanilla and lemon zest and combine until smooth. Blend in flour and continue to mix on low until completely blended and smooth.

5. Place one scoop of cream cheese mixture into each muffin well, about ¼ cup in each. When all wells are filled, gently tamp tray to settle mixture and avoid air pockets.

6. Place tray in oven and bake for 25 minutes.

7. Remove from oven and let stand until cool, then refrigerate for 90 minutes.

8. Microwave 1 cup of the chocolate pieces in a microwave-safe cup for 30 seconds or until chocolate is melted.

9. Remove cup carefully from microwave and drizzle chocolate over cheesecakes.

10. Top each cheesecake with berries and serve.


Baby Cheesecakes by The Petite Gourmande

The Petite Gourmande

© 2017 by Ruth Barnes, all rights reserved

facebooktwittergoogle_pluspinterestlinkedinmailfacebooktwittergoogle_pluspinterestlinkedinmailby feather

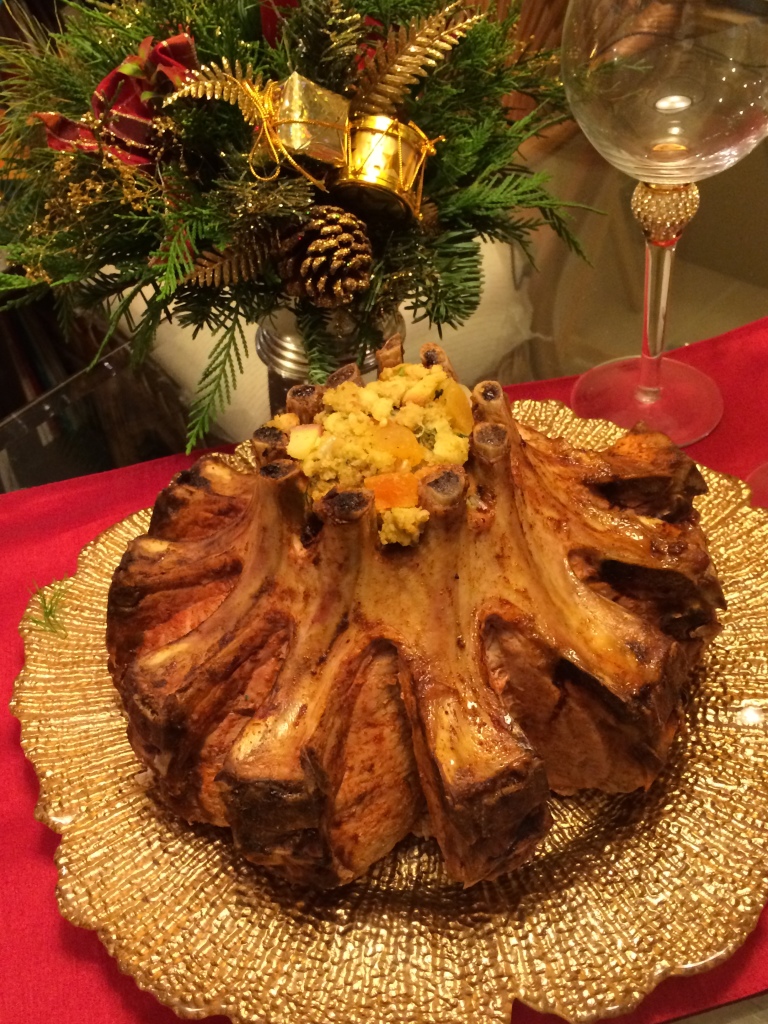
Crown Pork Roast with Stuffing and Peach Sauce

photo-101hhh

The Holiday season rings in bells of joy and warm wishes  for the upcoming new year.  This means time spent with family and friends, enjoying special dishes and sweets that bring smiles to all.  On Christmas each year our dear friends invite my family to their warm home to celebrate the holiday and I bring a beautiful crown roast as well as Christmas cookies for dessert.

May the light of Christmas shine down upon you and your family this holiday with blessings for a Happy and Healthy New Year

photo (10)

Crown Pork Roast with Stuffing and Peach Sauce

Serves 8-10

Ingredients

For the Roast

1 Crown Pork Rib Roast (10-12 ribs)

2 tablespoons of olive oil

1 teaspoon sweet paprika

1/2 teaspoon salt

1/2 teaspoon ground black pepper

1 14″ roasting pan

1 teaspoon oil for brushing

1 large piece of aluminum foil

For the Stuffing

1 10 oz box of herb seasoned stuffing

2 carrots cut into small cubes

2 stalks of celery cut into cubes

1 medium vidalia onion chopped

2 ambrosia apples (or 1 large red apple) cut into small cubes

1 cup low sodium chicken broth

1 tablespoon butter

2 tablespoon olive oil

1/2 teaspoon salt

1/2 teaspoon pepper

For the Sauce

2 16oz bags of sliced frozen peaches thawed

1 10oz jar of peach preserves

1 tablespoon of butter

1 tablespoon of brown sugar

1/4 teaspoon allspice

1 cup of port or sweet sherry

1/2 cup low sodium chicken broth

Directions

1. Preheat oven to 375 degrees

2. Prepare the stuffing according to the directions on the packaging and set aside.

3. In a large frying pan heat the olive oil and butter on medium heat and sauté the onions until they are soft and translucent.  Add carrots, celery and apple, season with salt and pepper and continue to sauté for an additional 7-10 minutes.  Remove  from heat and let it cool.

4. In a large mixing bowl combine the stuffing with the vegetables and mix well, set aside.

5. Brush the roasting pan with olive oil and rest the crown roast in the pan.

6. Rub the roast with olive oil, sprinkle the salt , pepper and sweet paprika evenly.

7. Fill the roast with the stuffing mixture ( the remaining stuffing can be served as a side dish).

8. Cover the tip of the bones and stuffing with the foil, place on middle rack of oven and cook for 20 minutes on 375.

9. Lower the oven temperature to 325, remove the foil and cook the roast for an additional 2 hours, or until the meat reaches a temperature of 150 degrees.

10. While the roast is in the oven begin making the peach sauce.

11. In a large sauté pan melt the butter, add the frozen peaches, brown sugar, and allspice.  Remove the pan from the heat and carefully add the port to deglaze the pan.  Add the chicken broth and then return to heat.

12. Add the peach preserves mix well and then simmer on low heat for approximately 15-20 minutes, until the sauce reduces by half.

13. When the roast is ready remove it from the oven and let it rest for 10 minutes.

14. Carve the roast into chops and serve with the peach sauce and remaining stuffing.


Happy Holidays
The Petite Gourmande
© 2017 by Ruth Barnes, all rights reserved


facebooktwittergoogle_pluspinterestlinkedinmailfacebooktwittergoogle_pluspinterestlinkedinmailby feather

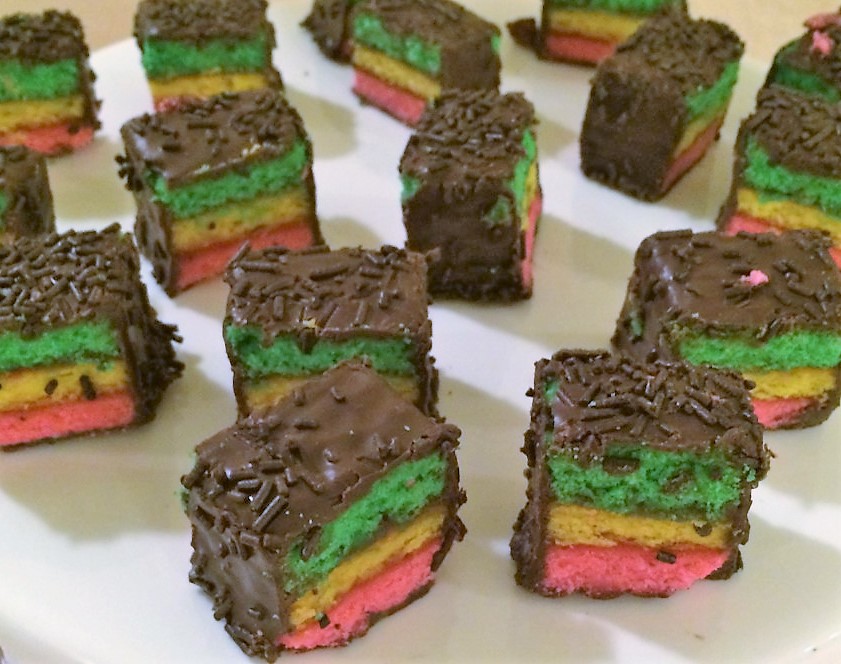
Italian Flag Cookies

Italian Flag Cookies

Italian Flag Cookies are fluffy and light and can be enjoyed with tea or as an afternoon treat.  These special cookies have just the right amount of sweetness and have almond paste as a main ingredient.


Italian Flag Cookies

Makes 24 cookies

Ingredients:

2 cups all purpose flour

2 1/2 sticks of butter

2 – 8 ounce cans of almond paste

1 1/4 cup of sugar

5 eggs seperated

1/2 teaspoon salt

1 8 ounce jar of raspberry preserves

8-10 drops green food coloring

8-10 drops pink food coloring

8-10 drops yellow food coloring

1 pound semi-sweet chocolate melted

1 teaspoon almond extract


Directions:

Preheat oven to 350 degrees

1. In a stand mixer fitted with a paddle attachment, combine the almond paste, sugar,almond extract, butter, salt and egg yolks.  Mix until smooth.

2. Slowly add the flour and continue to mix until fully combined.

3. In a large bowl beat the egg whites until stiff peaks form.

4. Gently fold the egg whites into the dough mixture and combine well.

5. Separate the dough into 3 equal parts and add one color selection to each.

6. Spread each section evenly into 9×13 baking pans and bake for 10 minutes.

7. Remove and let cool.

8. Begin building the layers, using the pink as your bottom.  Spread a layer of preserves on the pink layer and then place the yellow on top of it.  Again spread another layer of preserve jam and place the green layer on top of that.

9. In a small bowl melt the chocolate and spread a layer on top of your green layer and sides.  Scatter the chocolate sprinkles and place in the refrigerator for one hour to allow the chocolate to settle.

10. Gently flip the cake to expose the pink layer and spread chocolate on the bottom and refrigerate again for one hour.

11. Cut the cake to small squares or larger to your liking and serve.


Happy Holidays & Happy Cooking!

The Petite Gourmande

© 2017 by Ruth Barnes, all rights reserved
facebooktwittergoogle_pluspinterestlinkedinmailfacebooktwittergoogle_pluspinterestlinkedinmailby feather

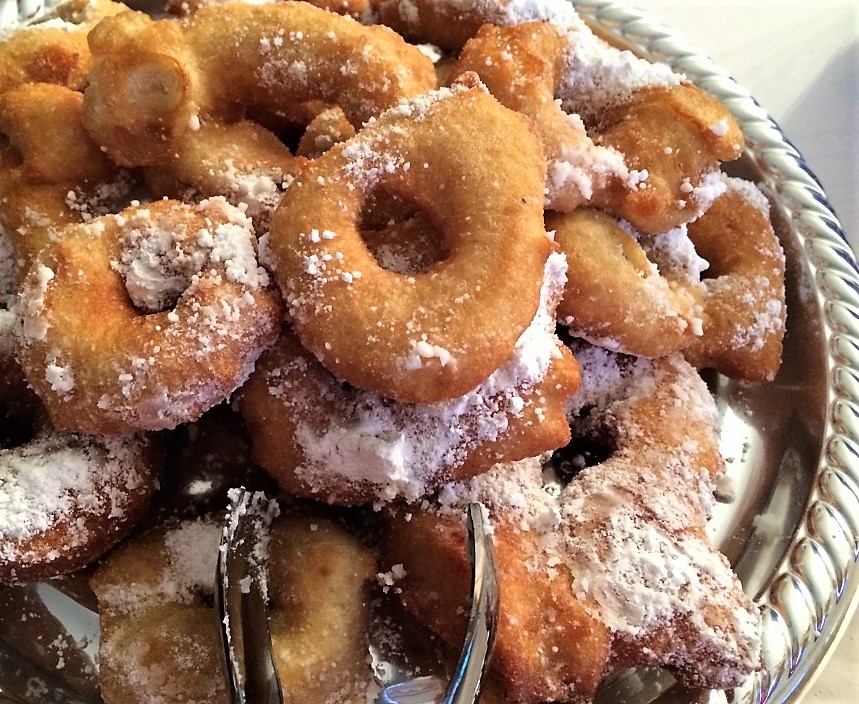
Moroccan Hanukkah Doughnuts

doughnuts

The Holiday of Hanukkah celebrates the miracle of light, where one small pitcher of oil lasted for eight days.  During this holiday my family and I get together and we fry doughnuts, sing songs and light the Menorah.  These doughnuts are a wonderful combination of savory and sweet, and will leave your family wanting more.


Moroccan Hanukkah Doughnut

Serves 10-12


Ingredients

5 cups All Purpose Flour

2 packets of Fleischmann’s Active Dry Yeast

1/2 cup warm water

1 1/2 cup of water

1 teaspoon granulated sugar

1/4 teaspoon salt

1 cup confection sugar for dusting

Vegetable oil for frying (24 ounces, add more as needed)


Directions

1. In a small cup mix the 1/2 cup of warm water and the packets of yeast.  Let sit for 5 minutes

2. In a large mixing bowl combine the flour, remaining water, granulated sugar, salt and yeast mixture.  Mix well.

3. Cover the dough with a kitchen towel and let rest for 1 hour.  The dough should rise and double in size.

4. In a large and deep frying pan heat the oil on medium heat.

5. Take a handful of dough, roughly the size of a tennis ball, and create a large hole in the center and carefully place the doughnut into the hot oil.

6. Fry the doughnuts in batches, 5 minutes on each side until golden.

7. Remove from oil and place on a serving platter.

8. Dust with confectioner sugar and serve with mint tea.


Happy Holidays & Happy Cooking!

The Petite Gourmande

© 2017 by Ruth Barnes, all rights reserved

facebooktwittergoogle_pluspinterestlinkedinmailfacebooktwittergoogle_pluspinterestlinkedinmailby feather
« Older Entries Recent Entries »